How to Screenshot on Mac Book?
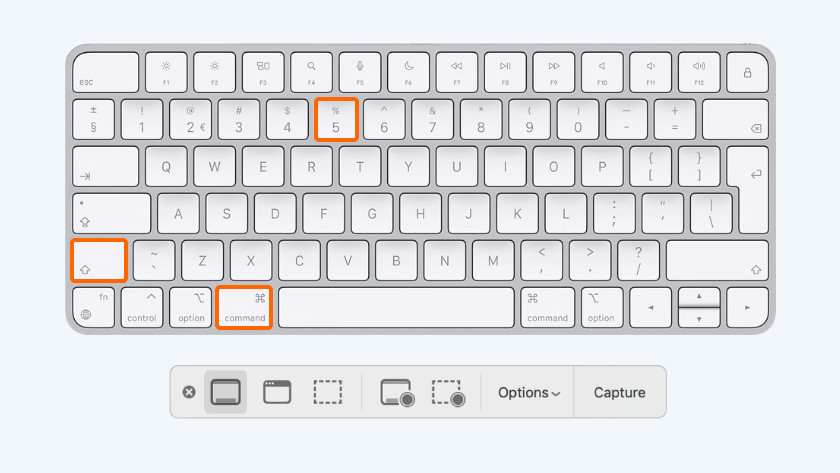
To screenshot on a MacBook, use Shift-Command-3 for the whole screen, Shift-Command-4 to drag a selection, or Shift-Command-5 to open the Screenshot toolbar for more options (like window capture, screen recording, or changing save locations). Screenshots save as PNG files to your desktop by default, but you can press the Control key with any shortcut to copy it to the clipboard instead.
Fast screenshot of selected area Our app allows you to select any area on your desktop and take its screenshot with 2 button-clicks. Easy-to-use application - Simple and intuitive user interface makes your work with the app easier and faster.
Share screenshots via InternetUpload your screenshot to the server and get its short link right away. Powerful editorsYou can edit screenshots instantly when taking them or later using a powerful online editor. Similar image searchFind similar images. Select any image on your screen and find dozens similar images.
Whether you’re looking to share a bug you’ve found with a coworker, guide someone through a software install, send your hilarious IT joke you’ve hidden in your file manager, or anything in between, taking and sharing screenshots can be very useful.
Luckily, both Windows and Mac Operating Systems (OS) make it easy to take a screenshot on your computer. While it can get a little bit more complicated if you use a keyboard that’s different from your Operating System, we’ll show you that it’s still not too challenging.
So get ready as we take you step-by-step, with pictures, through how to take a screenshot on Windows and Mac computers.
How to take a screenshot on Windows
Taking a screenshot of the entire screen on a Windows computer is actually really easy, as the keyboard of the laptop or computer should have a button that says either PrtScn, Print Screen, or something similar.
This button will likely be on the right side of the keyboard, but not always, depending on what computer model or keyboard you’re using. It may be on the top of the keyboard, like in the picture below.

Or, it may be on the bottom of the keyboard like in the picture below that. There’s no hard and fast rule when it comes to where your print screen button will be on your keyboard, it may take a bit of searching.

To take and the save a screenshot directly in your files, just press the Windows button (⊞) + PrtScn button at the same time. For some Windows devices, you’ll be able to select the area that you’d like to take a screenshot of. For others, it will automatically take a picture of the active window. The image will be saved under the Screenshots folder.
If you’d rather copy your screen to paste elsewhere (like in Word or Paint), then just press the PrtScn button on it’s own. Then you can simply press Ctrl + V to paste the image or right click your mouse and select Paste in the software where you’d like to paste the image.
If you’re looking to take a picture of only the active window – then you can press Alt + PrtScn, which will copy the active window to your clipboard
How to take a screenshot on Mac
Taking a screenshot on Mac is as easy as pressing command (⌘) + shift + 3, command (⌘) + shift + 4, or command (⌘) + shift + 4 + space bar, depending on whether you’re looking to capture the entire screen, a specific area, or a specific window.
How to screenshot the full screen on a Mac
If you want to take a screenshot of your whole screen, you just need to press command (⌘) + shift + 3 all at the same time, as seen below.
This will automatically take a screenshot, which will be saved to your files, generally with the file name “Screen Shot [date] at [time].png”
How to screenshot a specific area on a Mac
To take a screenshot of a specific section of your Mac, just press command (⌘) + shift + 4 all at the same time, as seen below.

This will turn your cursor into a crosshair, which you can then use to highlight the area that you’d like to take a picture of by dragging from corner to corner.
If you want to cancel the screenshot, you can simply press the escape (esc) button.
How to screenshot a specific window or menu on a Mac
To take a screenshot of a specific window or menu on your Mac, just press command (⌘) + shift + 4 all at the same time, and then click the space bar.
You should see your cursor first turn into a crosshair, and then a camera icon after clicking the space bar. This indicates that you’re ready to choose which window you’d like to screenshot.
Now you’ll just need to click the window that you’d like to take a screenshot of and it will automatically be saved to your files. If you’d like to remove the window shadow from the screenshot, just hold in the option (or alt ⌥) button while clicking on the window.
To cancel the screenshot, simply press the escape (esc) button.
How do I take a screenshot on Windows with a Mac keyboard?
If you’re using a Windows computer with a Mac keyboard, or even a Mac computer running a Windows OS, you can still use keyboard shortcuts to take a screenshot.
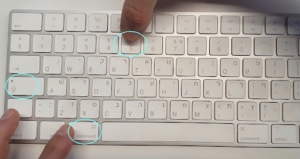
To take a screenshot of the entire screen, just press and hold the fn, Shift, and F11 (generally the default PrtScn) buttons at the same time.
If you’d only like to take a screenshot of the window you’re currently using, then just press the Option, fn, Shift, and F11 buttons.
Depending on your Mac keyboard/model, the PrtScn button can be automatically assigned to the F13 button instead.
How do I take a screenshot on Mac with a Windows keyboard?
You can also use keyboard shortcuts from a Windows keyboard to take screenshots on a computer running a Mac OS.
You’ll just need to press the Windows button (which in this case acts as the Mac’s command button, Shift, and 3 to capture the screen shot.
This will take a picture of the entire screen and save the screenshot as a .png file on the desktop of your computer or laptop.
If you’d like, you can also right-click on the saved screenshot file, and rename the file to anything you’d like!
Where do screenshots go on PC?
When you take a screenshot on a Windows computer, it’s usually saved automatically on your computer under This PC > Pictures > Screenshots.
What is the shortcut key for screenshot in Windows 10?
When answering the question, keep in mind that there are a LOT of different hardware options—like different computers, laptops, and tablets—that can run Windows 10 on them, and therefore there may be different options for shortcut keys to take screenshots on.
But, the following function keys should work in creating your screenshots.
To take a screenshot on Windows 10 or 11, press the Windows Logo Key (⊞) + PrtScn button at the same time, which will also automatically save it to your files.
If the keyboard that you’re using doesn’t have the PrtScn button, which you can see in the image in the above sections, you can also click the Shift + Windows logo key (⊞) + S to use the Snipping Tool to save a screenshot.
Posted on 2025/12/15 07:28 PM